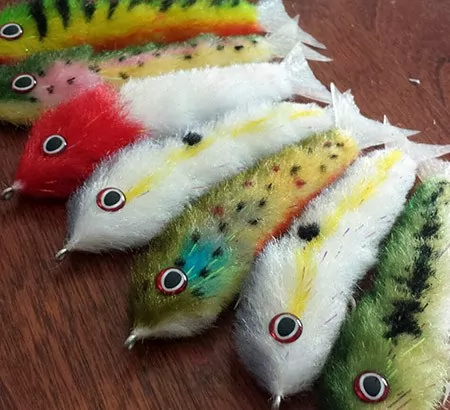
Big fish and big flies go together like beer and chicken wings, and big articulated streamers have a realistic action that’s hard for big bass, pike and musky to pass up. One of the most popular streamers is The Game Changer, which has multiple joints and a silicone tail creating a super-realistic swimming action. Retrieve it slow and steady to represent a cruising bait fish or with a more erratic, wounded fish motion that’s a strong trigger for predators.
Now take that killer fly, add a custom color pattern that’s dialed in to match the prey on your local waters and prepare to hook into some hogs.
In this article you will learn how to create articulated streamers in custom colors like the Brown Trout and Rainbow Trout for those rivers and lakes that hold monster fish waiting for stocked fish every spring, and three tried and true color patterns for bass, pike and musky… the Baby Bass, Sexy Shad and Firetiger.
Brown Trout
Rainbow Trout

Sexy Shad
Firetiger
Baby Bass
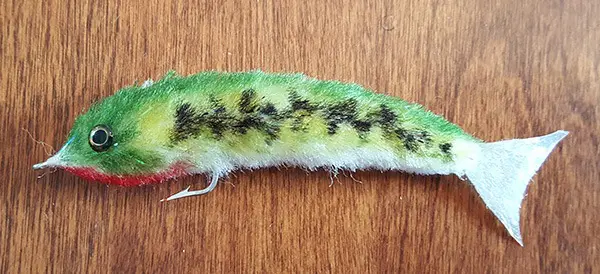
A word of warning. Once you start, it can be tough to stop, just like fly tying in general. We have created and tested so many color patterns that we’ve lost count. Some of them come directly from the pages of the Bass Pro catalog, where we’ve copied the best selling color patterns of the most popular bass baits.
Getting Started
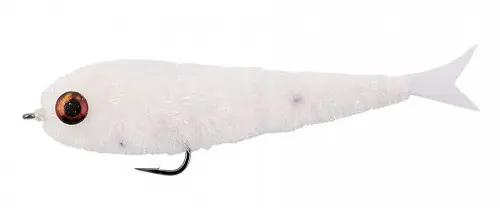
All that you need are white Game Changers and your choice of markers or paint pens. You can either tie your own flies (we have step by step tutorial at the end of the article), or buy them already made. They aren’t cheap if you buy them, so expect to pay about $12. The most reliable source seems to be Amazon, who has 4.5 inch flies on a 2/0 hook for $12.99…
Umpqua Chocklett’s Game Changer
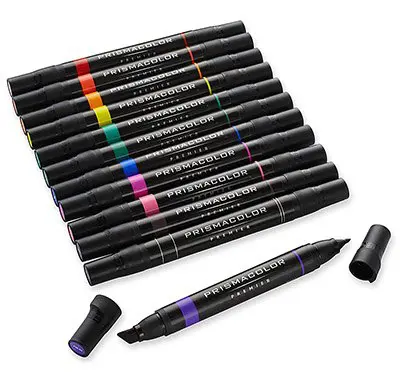
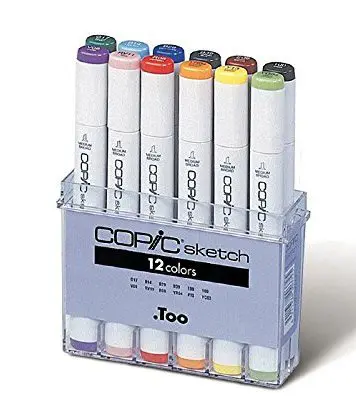
As for paint pens, Sharpies work well and come in big, bold, standard colors. Prismacolor markers are great and come in tons of colors and available at most craft stores. Copic is the only one who makes refillable paint pens in some great colors. They are expensive but the refills are cheap. You can also opt for the Copic Airbrush System, which uses their markers and creates some great effects. We’ve used it with templates and it opens up a whole other creative side.
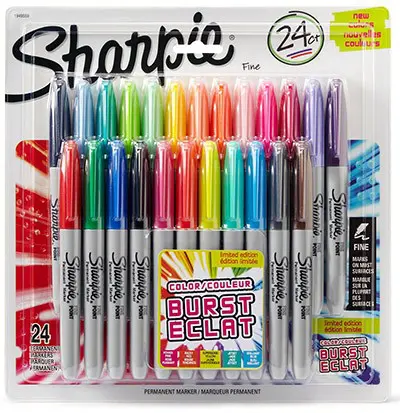
Once you have your gear your are ready to get creative. Here are step by step instructions on how we paint articulated streamers that catch big fish.
Brown Trout

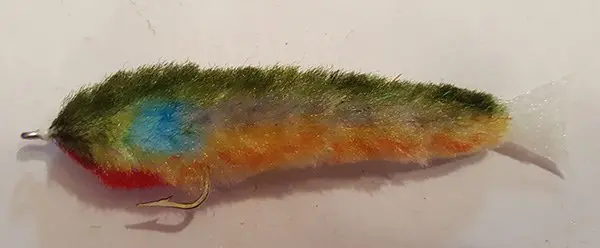
The rainbow trout gets a lot of attention but the brown is often overlooked as a great pattern for big bass. Our local lakes get stocked heavily with both and we’ve had just as much success with the brown trout pattern. Trout are also carnivorous and will eat their own, so when you decide to scrap the dry flies try one of these in your local river. If I had to pick one of our articulated streamers, this would be it.
The first step is to color the head and back in an olive green color. I use the Prismacolor Dark Olive Green (PM-28).

Next, color a stripe of light gray down the center of the fly. Start at the back of the head section through to the tail. Prismacolor Cool Grey 40% (PB-111) is a good choice, but any light grey will work.

Brown trout often have a bluish tint in the cheek so I add a little Prismacolor True Blue (PB39) to create that effect.
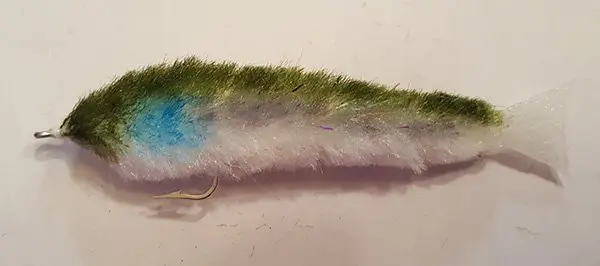
Color the lower 1/3 of the fly with a yellow shade, in this case Prismacolor Yellow Ochre (PB-18). I also add this color around the fly to fill in any white spots and to blend the green into the grey into the yellow.
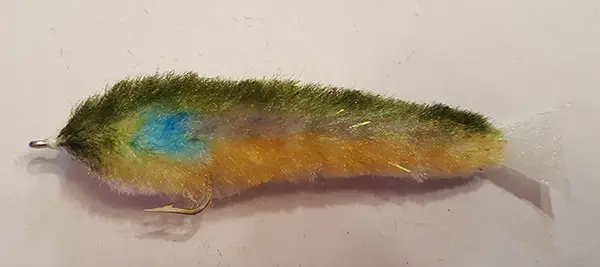
Dot the lower edge of the fly with an orange Sharpie. It will add some depth to the fly.
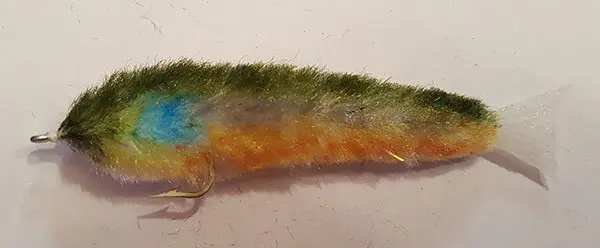
Articulated streamers should have a touch of red which is a predator trigger. Use a red Sharpie to color the throat of the fly.
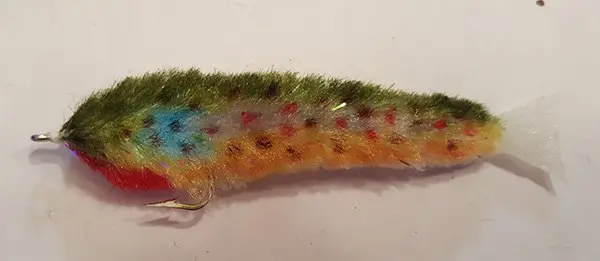
Use a spot template (see rainbow trout) or lightly dot in a brown and red spot pattern. I use Sharpies for this step. All that’s left is to glue on your favorite eyes and you’re done.
Rainbow Trout

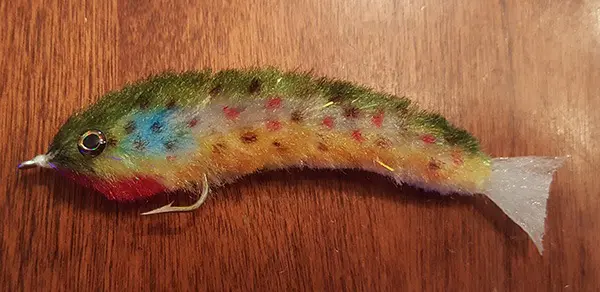
If you target big bass, the rainbow trout pattern is a must have. They are heavily stocked in rivers and lakes where bass key in on them. Every year, some of the biggest bass are taken with a rainbow trout pattern. Whether a fly or lure and you can certainly fish it in the rivers as big brown trout have no problem taking one down.
Start by coloring the back and head with Prismacolor Dark Olive Green (PM-28), add some over the lower cheek as well.
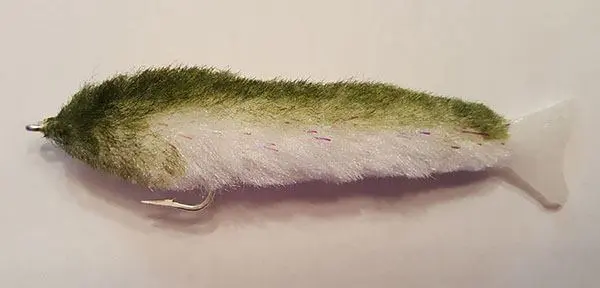
Step two is to add the signature pink strip down the side. I use a pink Sharpie and run a stripe through the center of the fly to the tail. I also add some to the cheek.
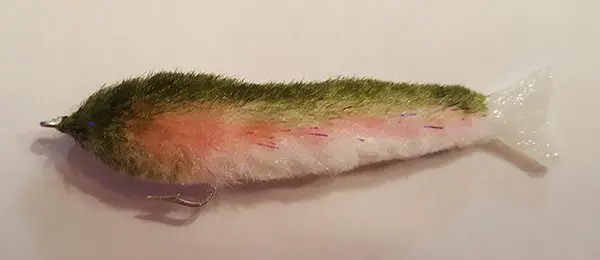
You can make templates out of pieces of a plastic water jug and use a pair of fly tying scissors to poke holes in it.
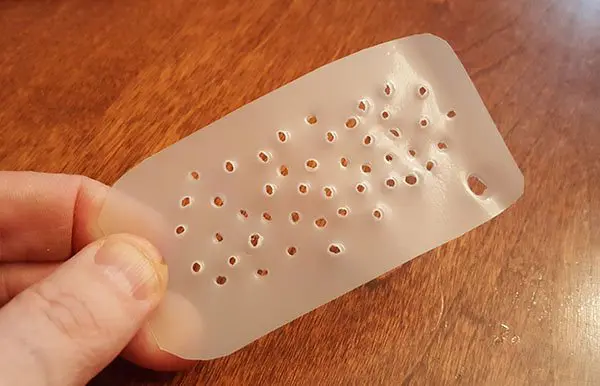
Place the template over the fly and with a fine tip, black Sharpie color in the spots.
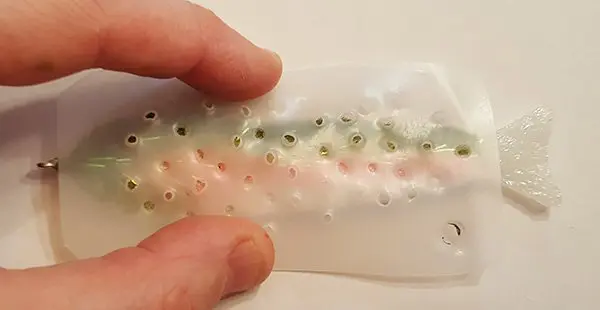
Glue in your favorite eyes and you have a rainbow trout articulated streamer. Ready to slay big bass!
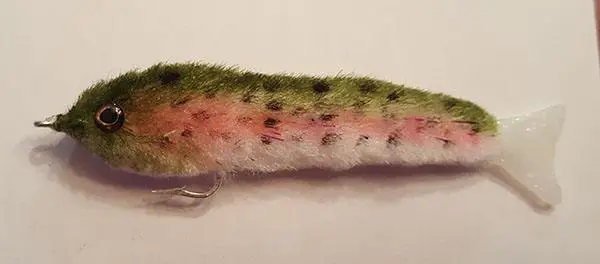
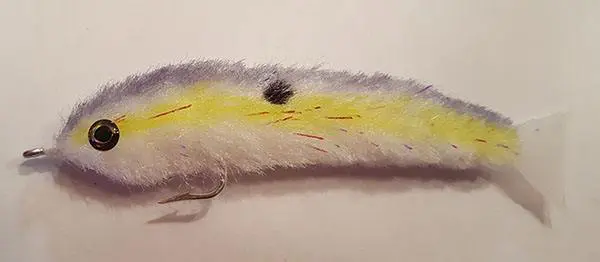
Sexy Shad

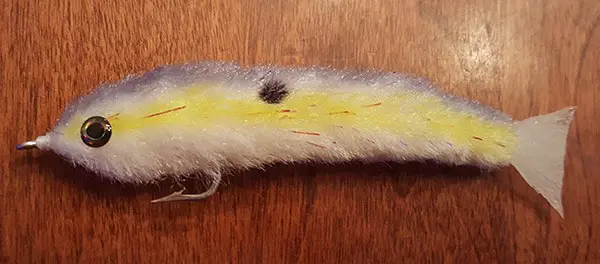
Watch any bass fishing tournament or flip through the pages of the Bass Pro catalog and you will see how popular the sexy shad color pattern is. So it only makes sense to add it to your fly arsenal. It produces extremely well and resembles a number of small bait fish, not just shad.
Color a grey stripe over the back of the fly from the nose to the tail. I use the Prismacolor Cool Grey 40% (PB-111).
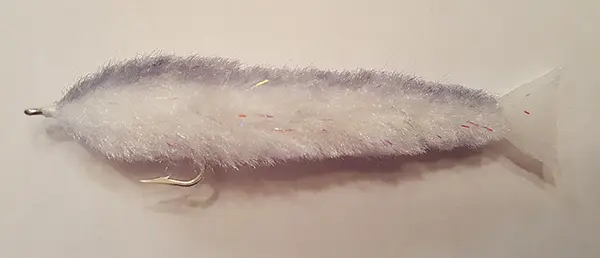
With a bright yellow shade color a stripe down the side of the fly. I use the Prismacolor Sunburst Yellow (PB-17).

Create a large spot on your template and place it about one third of the way back and in between the yellow and grey stripes. Use a black Sharpie to create the spot.

That’s all there is to it. It’s the simplest of the 5 flies, but also one of the most effective.
Firetiger

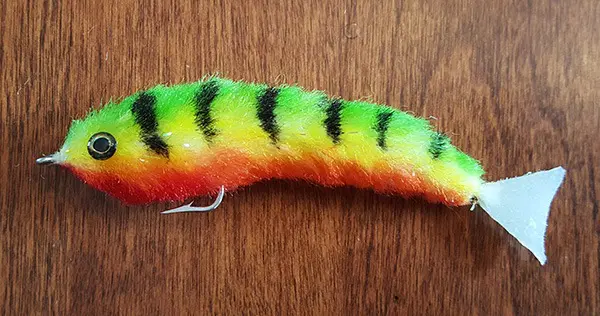
Bold and bodacious, the Firetiger tends to piss off a lot of fish including pike and musky, and the bigger the fly, the better. I’m not sure what the fish sees when this thing passes by but it must be irresistible because it gets slammed time after time. It’s easy to color and if you create your own stencils you can get very creative with the side bars.
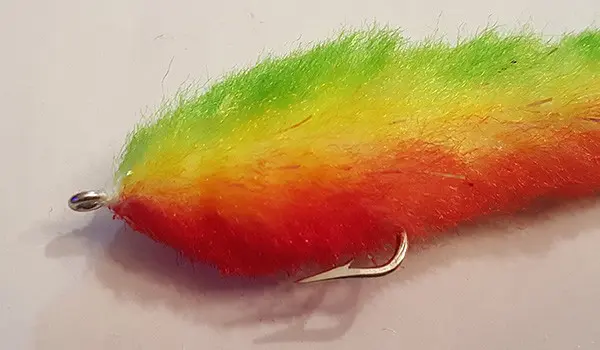
Use a chartreuse Sharpie to color the back of the fly from the nose to the tail. You can bring the color down the sides as well, just not too far as you will be adding the next color and blending them in.
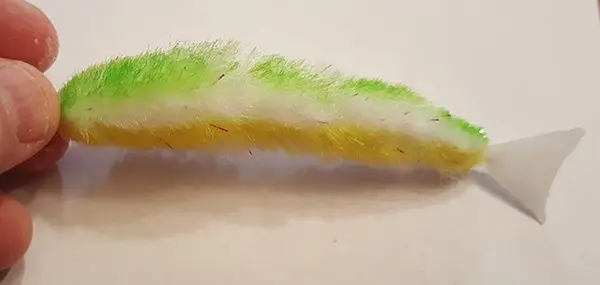
From nose to tail color the center of the fly with a bright yellow Sharpie or other yellow of your choice.
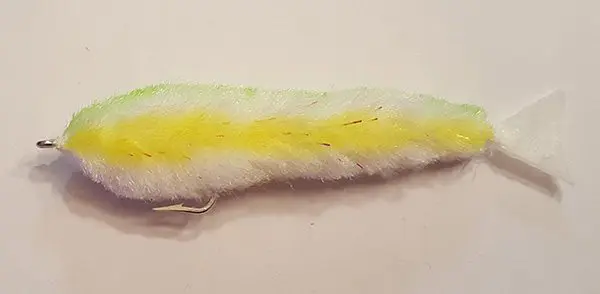
The bottom 1/3 of the fly should be a bright orange color, I also use a Sharpie for this step.

As you can see the color on this fly is 1/3 chartreuse, 1/3 yellow and 1/3 orange. Blend in the transitions so the whole fly is covered and no white is showing.
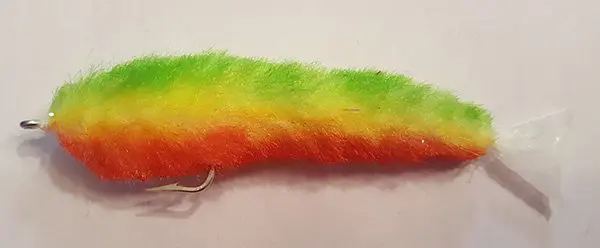
Use a red Sharpie and color a stripe from the bottom of the nose to the hook.
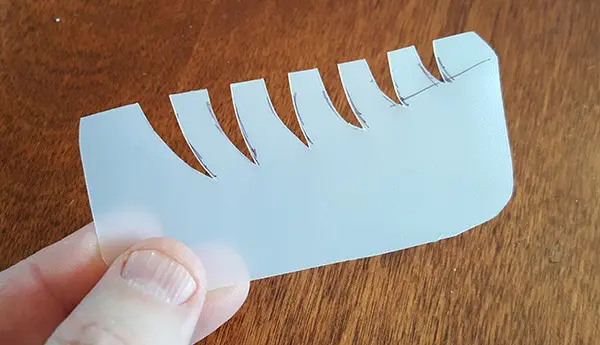
I have found that you get a sharper stripe pattern if you use a template which I draw and then cut.
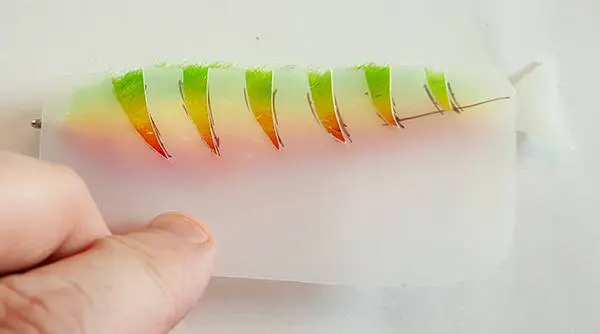
You can use the Copic Airbrush Kit and Black paint pen to color in the stripe pattern, or use black sharpie which is what I normally do.
Touch it up as you need to, add eyes and you’re done.
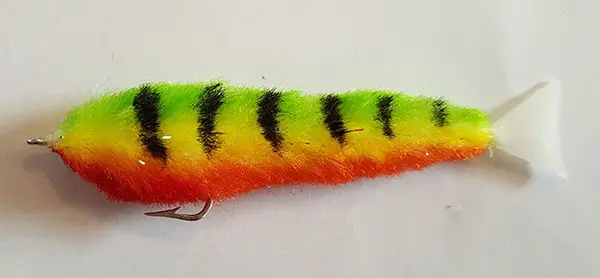
Baby Bass

Finally the Baby Bass. Present in almost every lake and eaten by bigger bass and every other predator. Each year a new batch are born and in the lakes all year. Fish it with that erratic, wounded fish action and you’ll be shocked by what comes out of the weeds to eat it.
Color the back and head of the fly with the Prismacolor Dark Olive Green (PM-28).
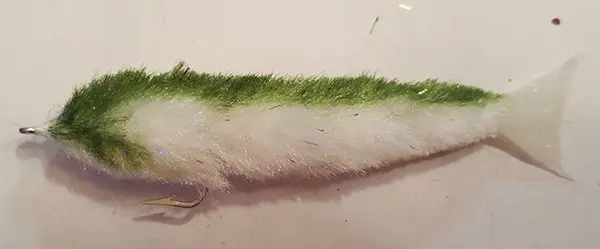
Take the same marker and run it lightly down the side of the fly. This will get blended in in the next step.
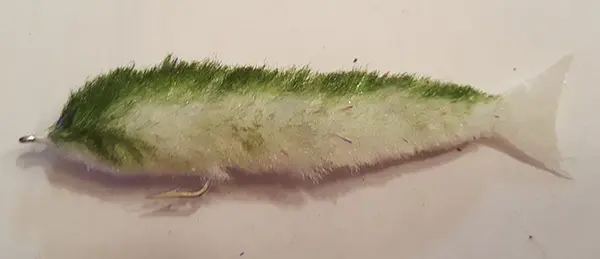
Color the sides of the fly with Prismacolor Yellow Ochre (PB-18). Blend in with the green above and make sure no white is showing.
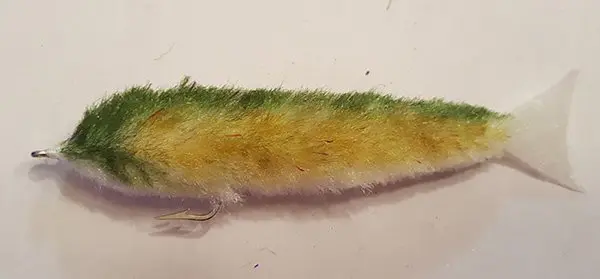
Prismacolor markers have a fine point which you can use to add small spots on the lower edge of the fly with the same dark olive green.
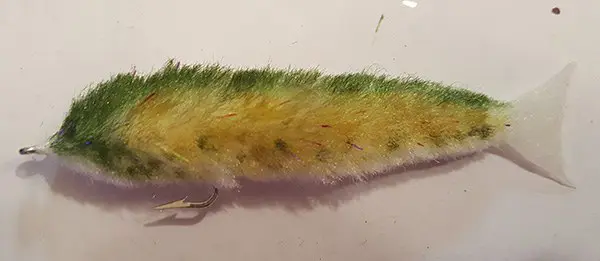
With a red Sharpie color the bottom of the nose to the hook.
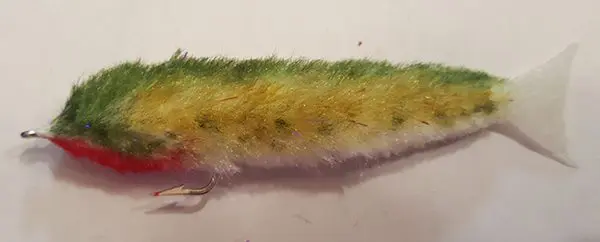
The baby bass is another pattern that you can use a template to get creative with the side spots which is super easy. Draw a pattern on a piece of plastic and cut it out with a pair of fly tying scissors.

Place the template where you want it, so the pattern is right in the center of the fly. Use either Copic Airbrush or a regular black Sharpie to paint in the color. Add eyes and you are done.

We’ve fished our top five color patterns for articulated streamers on local lakes with great success. You can try these or get creative and come up with your own patterns. Whatever you choose to do you’ll need flies. If you want to tie your own, read on! We have a full tutorial on how we do it.
Tying Your Own Articulated Streamers
Tying your own articulated streamers in the game changer style is relatively simple but can take some time and practice to get the hang of it. It’s definitely cheaper than buying flies and more rewarding to fish with something you have created. Here’s a step by step tutorial on how to tie them, which includes our own method of making an indestructible silicone tail, which is one of the keys to it’s action.
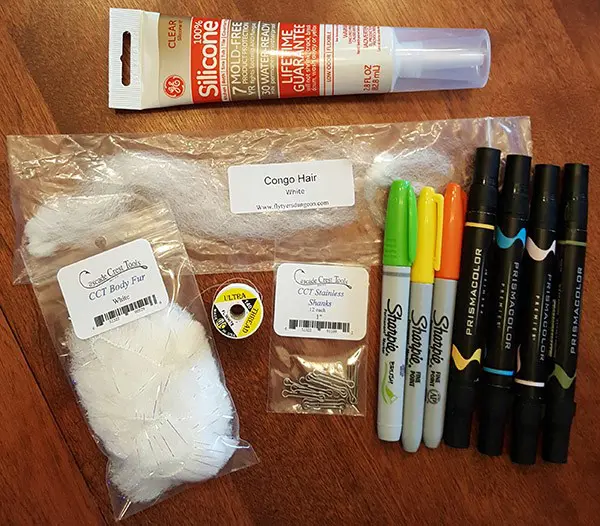
Materials List
- Clear Silicone. Can be found at any Lowes or Home Depot. This will be used for creating the tail.
- White Congo Hair. Just like EP Fibers but much cheaper at Fly Tyers Dungeon. This is also used for creating the tail.
- Stainless Steel Articulated Shanks (we use the one inch size for the entire fly). Cascade Crest Tools has the best price.
- White Body Wrap/Body Fur. There are several brands but I’ve found Cascade Crest CCT Body Fur to be the best quality and value.
- White Ultra Thread 140 Denier. You can use whatever thread you prefer as long as it’s strong.
- Eyes of Your Choice.
- Paint Pens and Markers.
- Hooks. For this fly we use a 2/0 Mustad Saltwater Hook, you can use whatever hook you prefer.
- Wax Paper. You will do your silicone work on it, it’s no stick and available at any grocery store.
Step One
Creating the Tail
We use a combination of Congo Hair and silicone to make indestructible tails that can take a lot of abuse from big fish. It’s on of the keys to that realistic action that these articulated streamers are known for. Here’s how we do it.
Place your articulated shank in the vice so the eyes are facing you and the gap is on top.

Attach your thread just ahead of the gap in the shank, then pull a two inch section of Congo Hair through the gap and to the back of the eye of the shank.
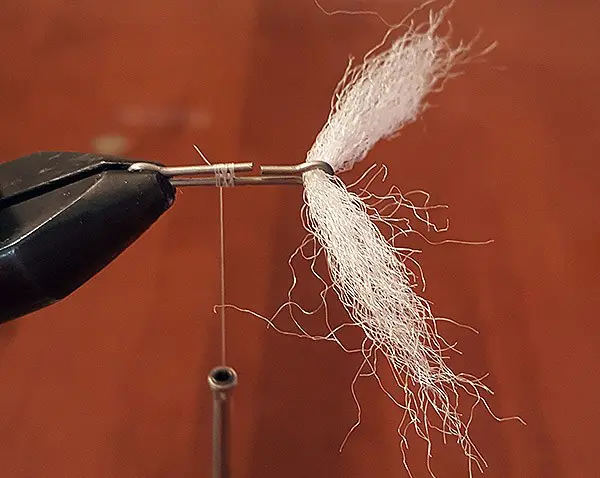
Wrap your thread to the rear of the shank and around the eye locking in your Congo Hair. Throw in a few half hitches and your ready for silicone. You can waste a lot of silicone making tails one at a time so tie up a batch of tails, then then apply silicone to them at the same time.
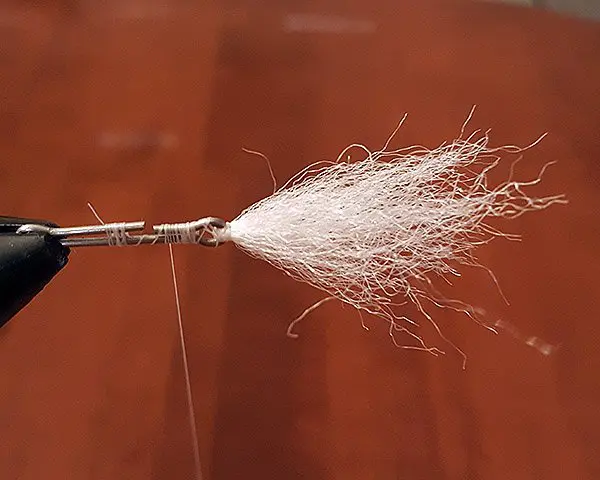
Lay out a small sheet of wax paper and squeeze out a large glob of silicone. Load some up on your thumb and forefinger.

Work the silicone through the fibers and on the shank eye. Don’t be stingy, you want it fully covered and you will trim away the excess when it sets.
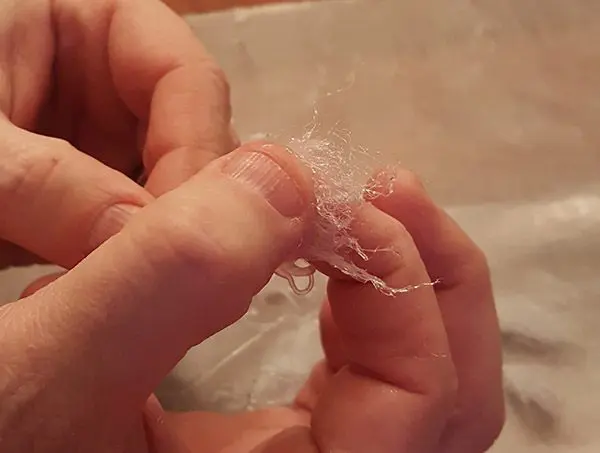
Place the tail flat on the wax paper and fax out the fibers. Add more silicone and spread it over the tail creating a fan shape.
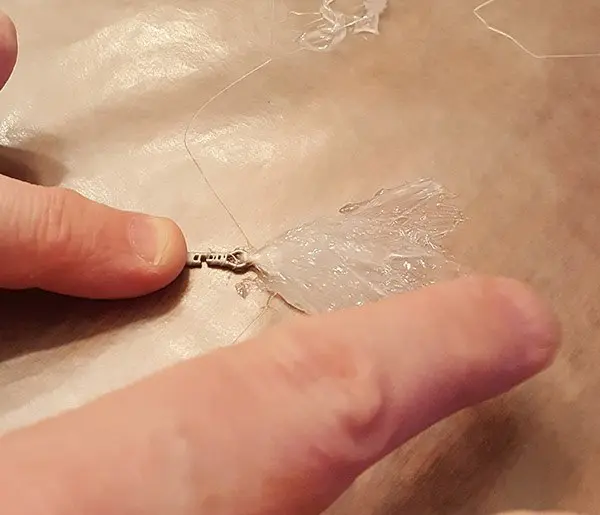
Once you’ve applied plenty of silicone and have the fibers spread out the way you want let the silicone set for a few hours.
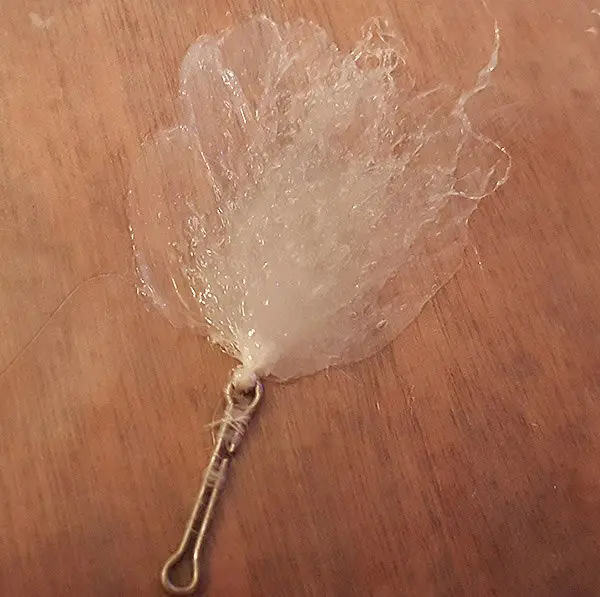
When your tails are dry and rubbery peel them off the wax paper.

Trim them to shape and you’ve got some super durable tails for your articulated streamers. You can see the Congo Hair fibers running all the way through the tail which gives it strength and stiffness which is key to this flies action.
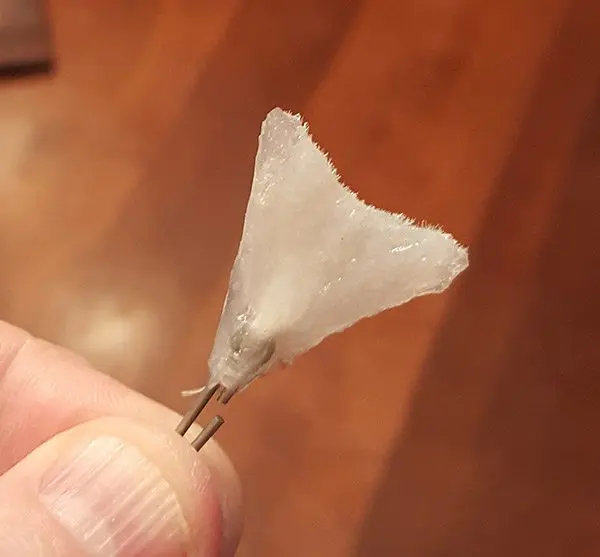
Step Two
Wrapping the Body Segments
From the tail to the head, each of the 4 segments will be wrapped exactly the same way. You want your material as close to the eyes of the shank without covering them. This will keep the fly looking full and consistent without getting in the way of the swimming action.
Connect your thread to the back of the articulated shank just in front of the eye.
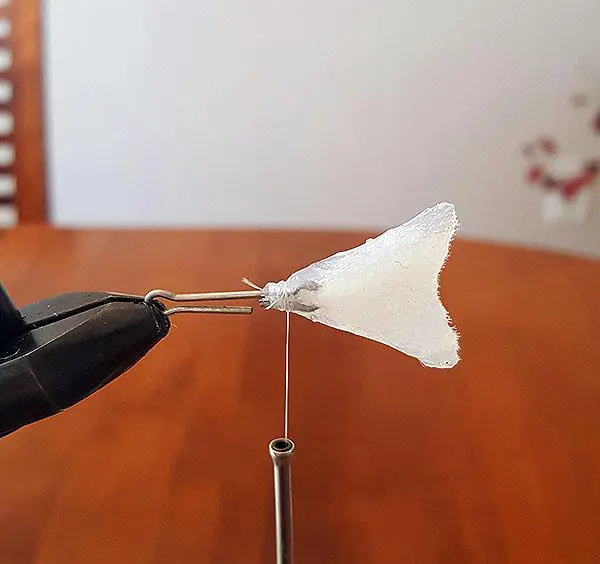
Tie in your body fur just in front of the rear eye, then wrap your thread forward to the front eye.
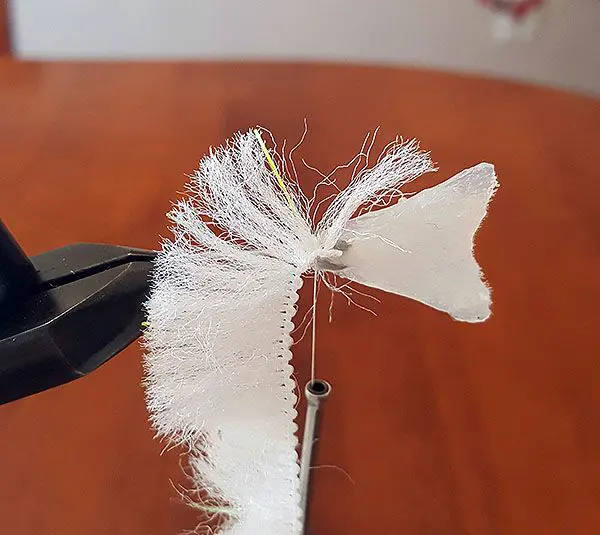
Wrap you material forward, keeping your wraps tight, work the fibers back with your fingers as you go.
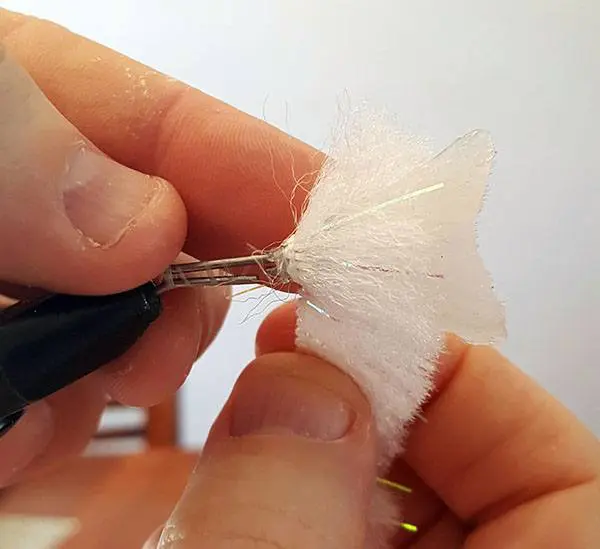
Once you reach the front end of the shank wrap close to the eye but not covering it so it hinges properly.
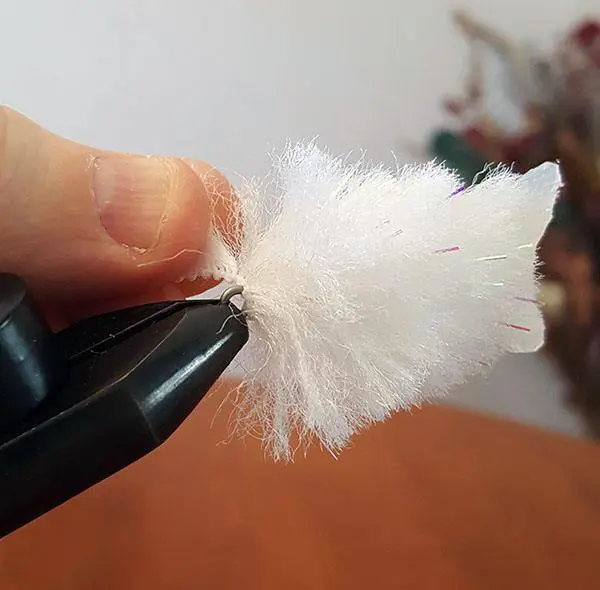
Take a couple of whip finishes and head cement. You are ready to move on to the next sections.
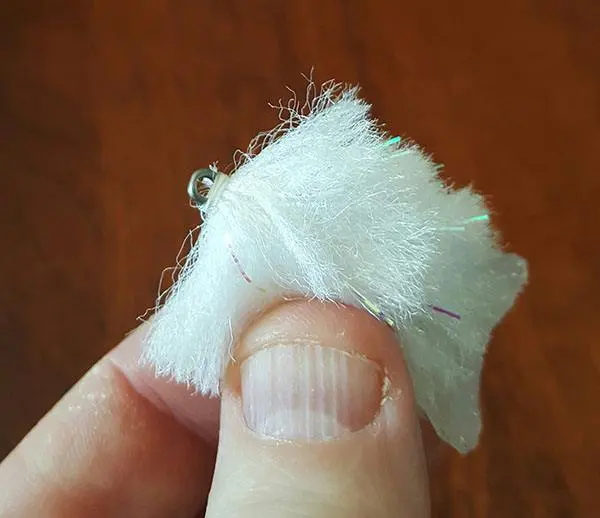
Clip the next section on, secure in the vice and repeat the same steps until you have 3 full sections including the tail. This fly will have 4 sections which includes the head/hook. You can add as many as you want depending on what you’re trying to imitate. I’ve tried a 6 section, 6 inch baby pike pattern that worked really well. It just wasn’t super easy to cast.

You can see that wrapping close and tight will create articulated streamers that have no visible space between the sections. The profile becomes a realistic bait fish.
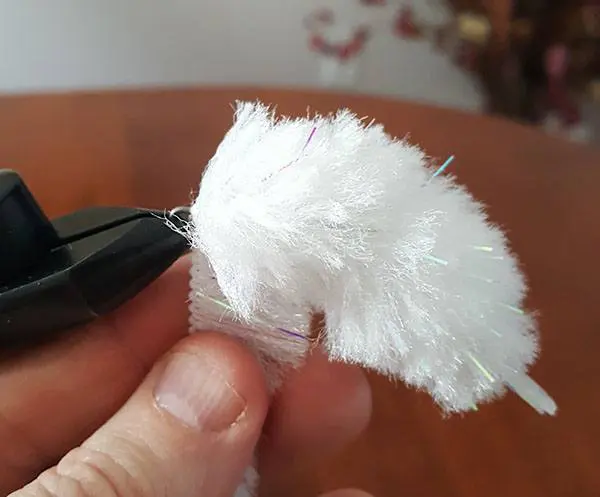
Once you finished tying three sections, clip on the fourth and you’re ready to attach to the hook and create the head.
Step Three
Attaching the Hook
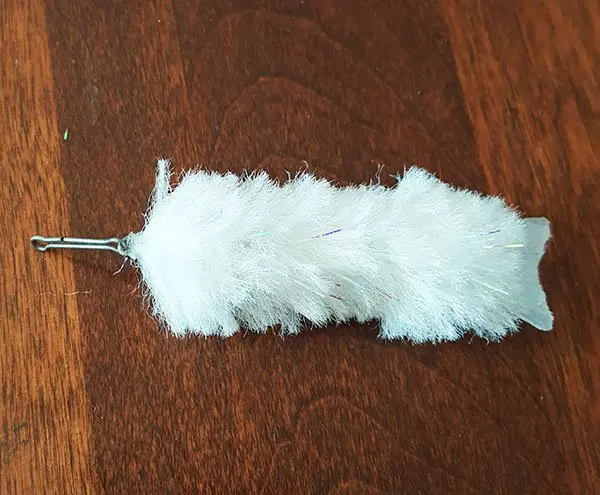
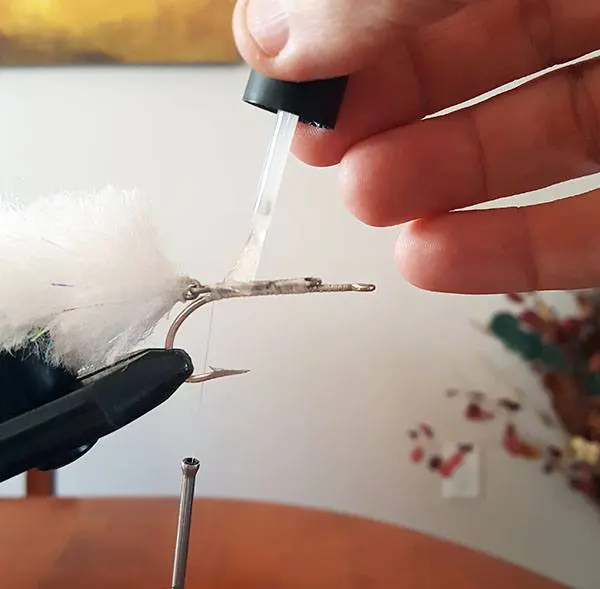
Place your hook in the vice and cover the shank with thread. Lay the articulated shank on top, place it far enough back so the eye of the shank can move freely from side to side, but not so far that your create a huge space. This picture shows a perfect placement. Once you have it where you want it wrap tightly from eye to eye.
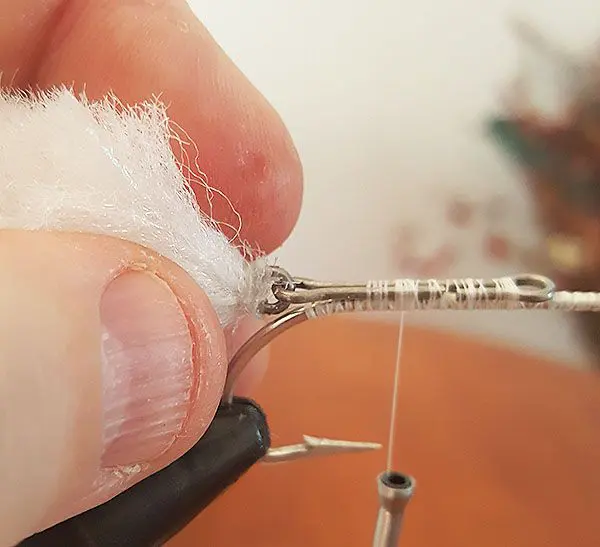
Once you feel you have it securely attached return your thread to the rear and apply several coats of head cement. This creates a durable attachment, and once you wrap it with body fur the hook isn’t going anywhere.
Step Four
Wrapping the Head Section
Wrapping the head section is the same as the other three. Start as close to the rear eye as you can get without impacting the joint, it needs to swing freely, and wrap forward. Where the hook meets the articulated shank can be a bit tricky but as long and you keep the fibers smoothed down and back it will be fine. Wrap your fibers densely all the way to the hook eye, create a clean head, whip finish and head cement.
That’s all there is to it. This is the recipe we use for articulated streamers. Now comes the fun part…
Step Five
Shaping the Fly
This is the most important step of the process. You don’t want to wreck your fly by hacking away at it with your scissors so I came up with my own shaping system that produces very consistent results.
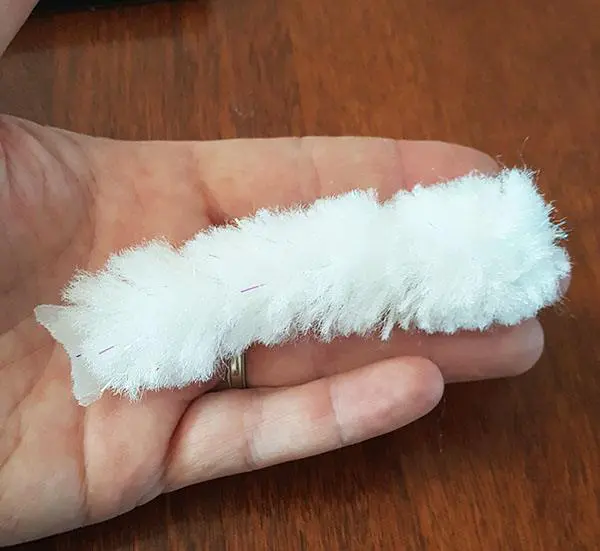
The first step is to brush out all the fibers with a short brush. Working back to front and all the way around the fly. You want all the fibers to stand straight out.
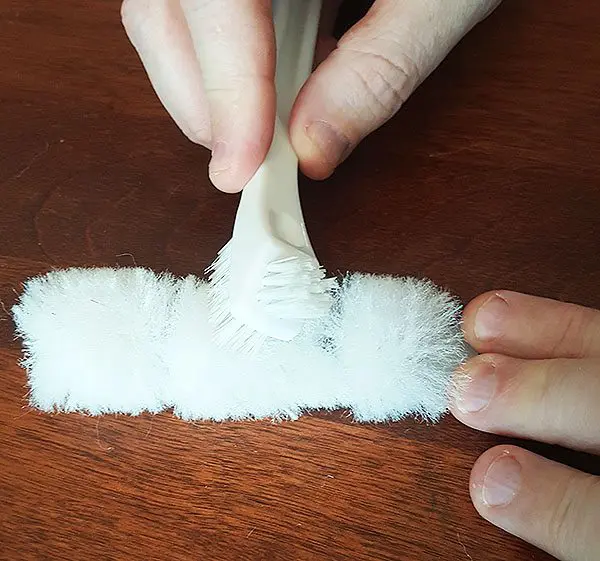
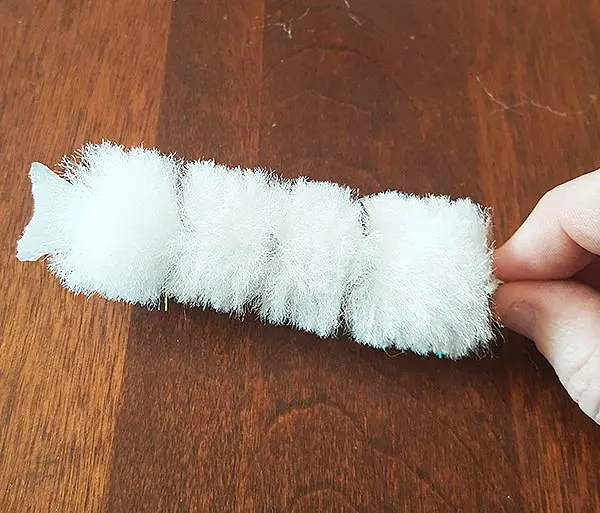
The right tool for trimming the fly is a sharp pair of shears. The longer blades let you make straighter, longer cuts keeping the shape of the fly consistent. If you use normal fly tying scissors it will take a lot longer and you will find yourself hacking away trying to keep the shape from section to section.
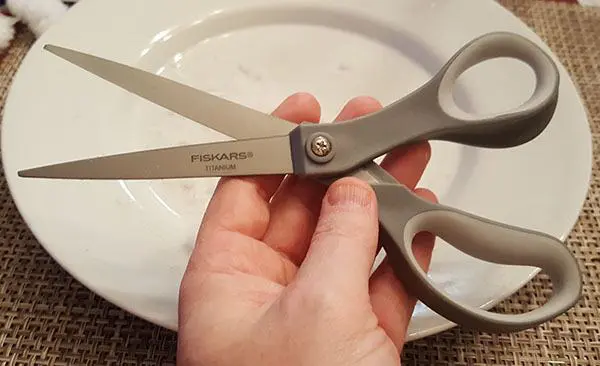
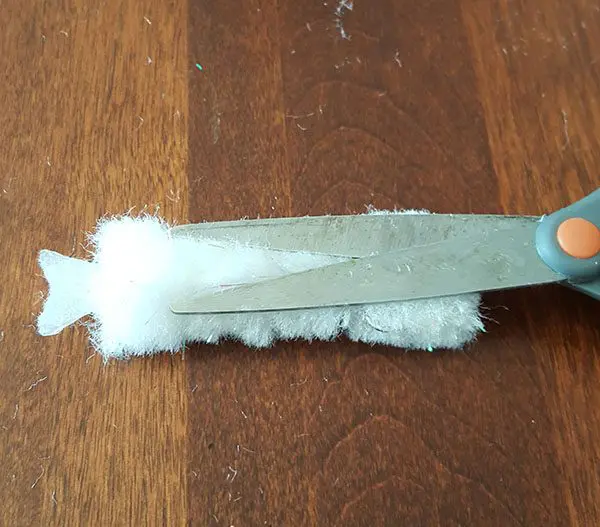
You can place the fly on a table or in the palm of your hand for the side cuts. Make sure the hook is parallel to the table and your scissors as you trim the sides and the head and tail sections.
Once your sides are cut you can use a smaller pair of scissors for finer work and shaping.
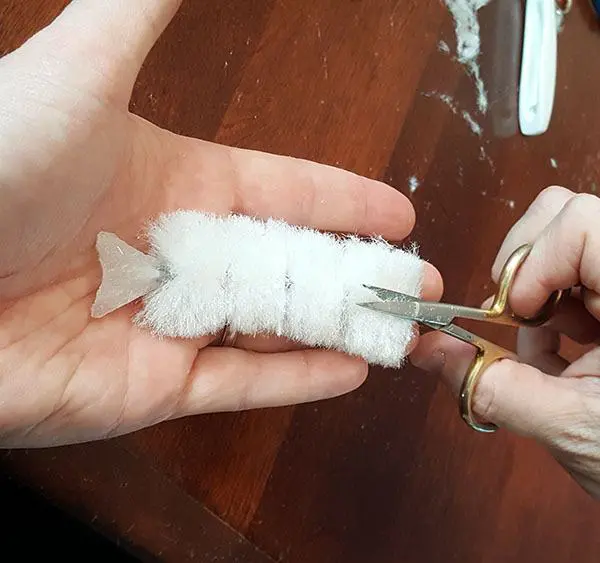
You should end up with a fly that looks something like this. Which is ready for top and bottom shaping.
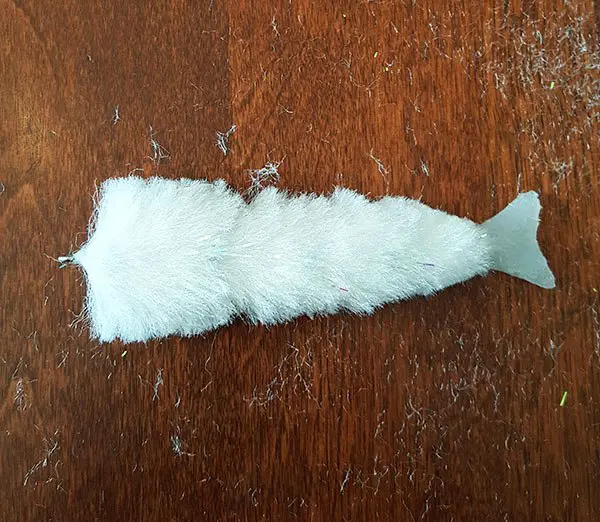
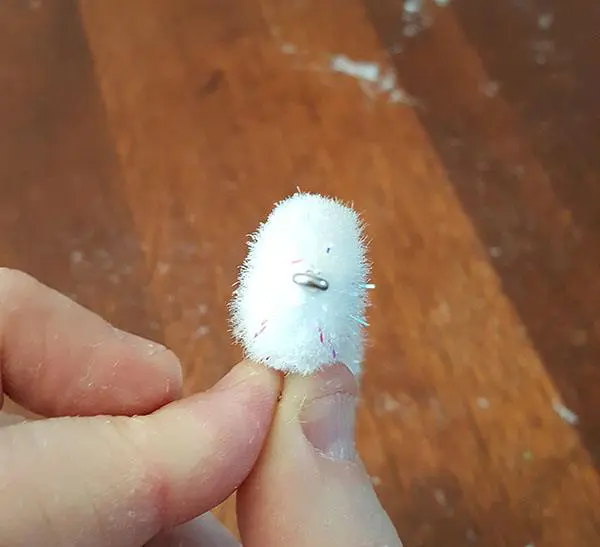
Using your long shears trim the top and bottom of the fly tapering down to a narrow tail.
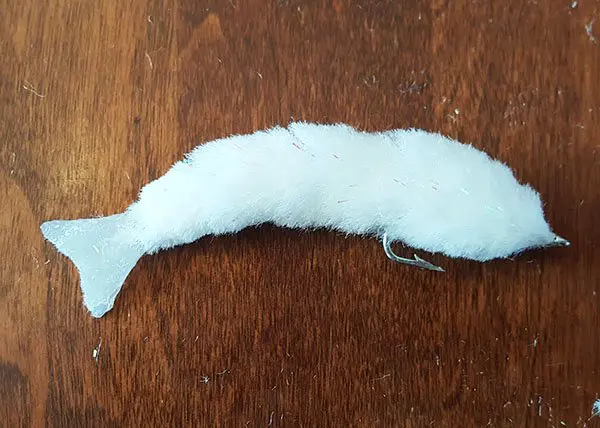
Continue to round and shape the edges until you have a nice aerodynamic shape. The more material you leave on these articulated streamers they harder they will cast and the faster they will sink. Try to keep them as tight as you can without creating bald spots in between the sections.
Wrapping It Up.
The only thing left to say is to get started making your own custom articulated streamers. Experiment with sizes, shapes and color patterns. You may find that your game changers end up being your ‘Go-To’ flies for big bass, pike, musky and everything else.

Thank you for your time and interest. We appreciate your support and hope you enjoyed the article. Feel free to comment or send us an email. Thank you!

