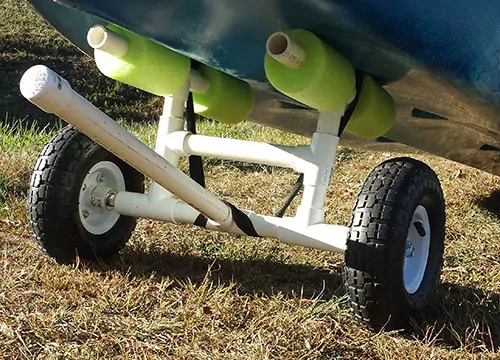
Roll that heavy kayak with a smooth, heavy-duty set of wheels that you can make yourself in about an hour.
This inexpensive DIY kayak cart will save your back and cost about 30 bucks.
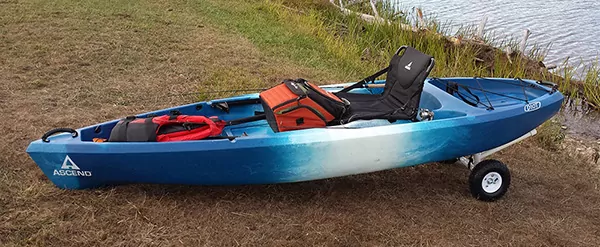
After my 10-foot sit-on-top kayak burned out a second set of kayak wheels, I looked for something I could make myself that would hold up to the abuse.
A quick trip to my local Lowes and Harbor Freight, followed by thirty minutes on the miter saw, and I had all of the components ready for assembling my DIY kayak trolley. Two heavy bolts and some PVC glue ensure it will last a long time.
It’s no exaggeration that it will take you less than an hour if you follow the directions.
I attach my kayak to the wheels with a strap that I run around the main axle and through the rear scupper holes, which hold them securely in place. They have never budged even on the 500-yard trail into my local lake, which is less than smooth.
I have had more people, pulling the same wheels I burned through, stop to ask me about my homemade kayak cart when we passed them headed to the lake.
It’s a great feeling knowing I made them myself.
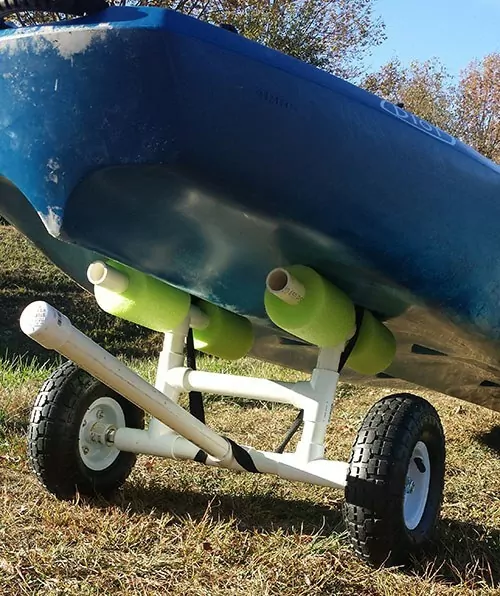
DIY Bulletproof Kayak Cart – Build Instructions + Pics
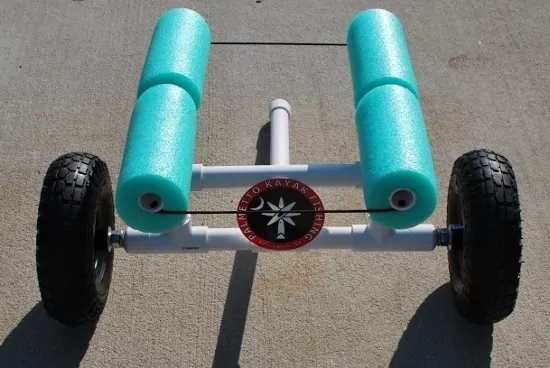
What you will need:
Visit Home Depot or Lowes to find the following:
- 3′ section of 5/8” threaded rod (~$4) – NOTE: it will be cut down to 25.5”
- 10’ Section of 1” diameter Schedule 40 PVC pipe (~$3)
- PVC Glue (~$3 – item “K”)
- 7 – 1” PVC Tee fittings (~$3.50 total – items “H”)
- 3 – 1” PVC Caps (~$1.20 total – items “I”)
- 5/8” “Create-A-Bolt” stainless steel nuts, washers & lock washers kit (~$3.80 Home Depot Item “J”)
Visit your local Walmart to find the following:
- JUMBO pool noodle (~$3.88 – item “L”)
Amazon is a good place to find the following:
- 2 – 10” pneumatic wheels/tires (~$15 – Items “M”)
Total Cost = ~ $38
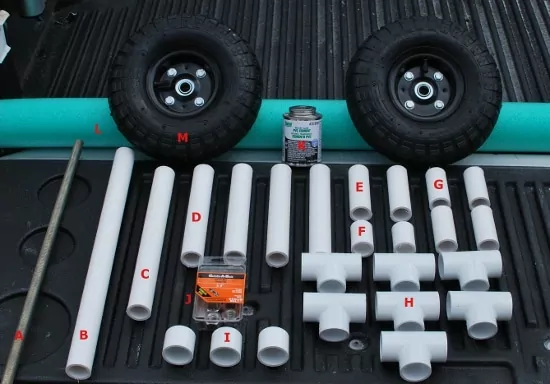
Step 1 – Cut the 10’ section of 1” PVC into the lengths below. Your LAST cut should be the piece of PVC labeled as “C” in the photo above. After you’ve fit the lower assembly together, check the measurement to ensure that “C” is the correct length.
- (B) – 18”
- (C) – 10.5”
- (D) – cut four 8” pieces
- (E) – cut two 4.5” pieces
- (F) – cut two 1¾” pieces
- (G) – cut four 3” pieces
Step 2 – Drill a 5/8” hole through two of the PVC end caps.
Assemble the lower unit pieces together by parts: (I) (F) (H) (E) (H) (E) (H) (F) (I) – There’s no need to use any glue here because the threaded rod holds the entire assembly together.
Step 3 – slide the threaded rod through the entire lower portion. Test fit the lock washer and nuts. Put the wheels on and screw on the outer bolts as well.
The rod is cut to 25.5″, but you will need to consider the size of your kayak to make sure this works for you. Tighten the inner nuts and lock washers down, and the PVC will not budge.
Step 4 – Insert two (G) pieces into the outer (H) pieces of the lower unit assembly you did in Step 2. Attach two (H) pieces to the end of (C) and attach those two (H) pieces to the (G) pieces you just attached to the lower unit. Glue each attachment in this step.
Step 5 – Assemble & glue the top support sections. The pool noodles will fit to these. (D) (H) (D) – with (G) attaching to (H) as well. Do this twice. Insert each (G) into the (H) pieces from the last step perpendicularly.
Step 6 – Glue the end cap to the handle section. Before sliding on the pool noodles that are cut to fit over the supports, drill holes in each of the 4 ends of the supports.
Slide the pool noodle over the supports and then tie in the paracord or rope. This is an important step as it will keep both supports facing the same way during the loading/unloading process.

