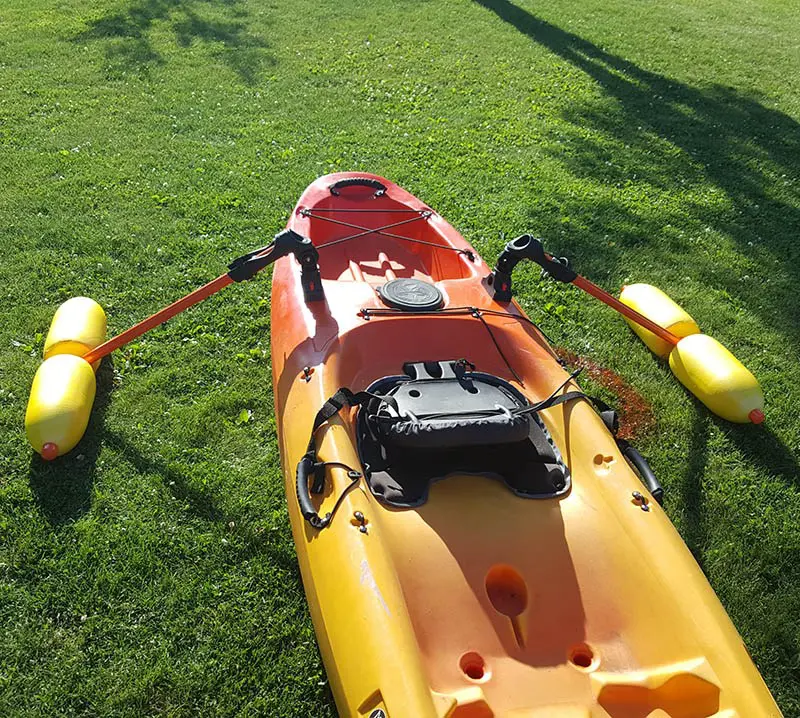
Turn any kayak into a stable fishing platform with this set of DIY kayak outriggers that are simple to build and cost about 60 bucks.
Compare that with kayak stabilizers you find online that cost $179.99 or more!
Whether you want to stand up and fish, use your kayak like a paddleboard, or feel safer and more confident in a tippy kayak, these modular and easy-to-use outriggers make kayaking much more fun.
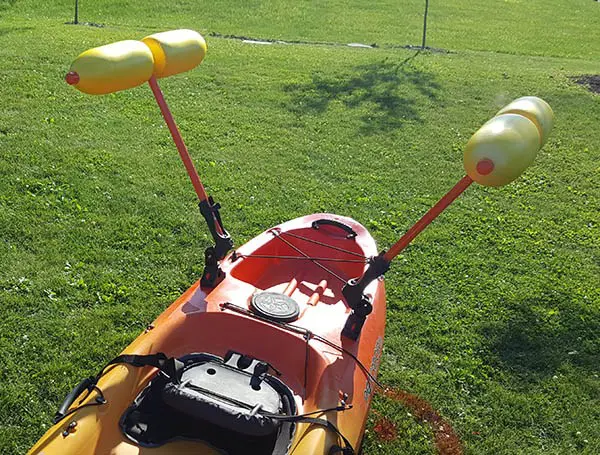
In this article, I will show you exactly how I built and attached this set of DIY kayak outriggers to my Perception Pescador 10.
Here’s what you’ll need:
- 4 Crab or Lobster Pot Buoys.
- 2 Adjustable Kayak Rod holders.
- 1 Ten Foot Section of ¾ inch PVC Pipe
- Four 3/4 Inch PVC Caps
- Two 3/4 PVC T-Joints
- 1 Can of Spray Paint
- Four 3 inch 5/16 Hex bolts
- 8 5/16 Washers
- Four 5/16 Lock Nuts
- Clear, heavy duty PVC glue
I have found the best deals, and most reliable sources for Crab Pot Buoys and Kayak Rod Holders on Amazon.
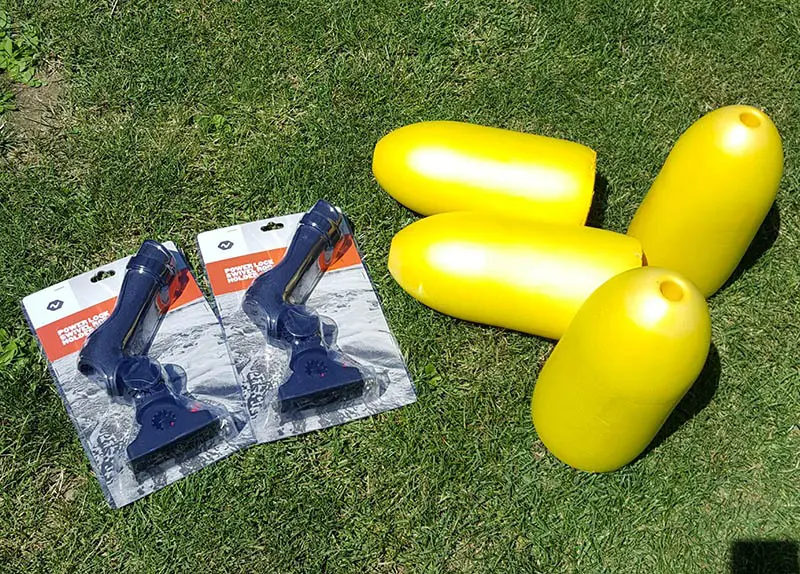
You can pick up this strong 2-pack of adjustable rod holders on Amazon. They swivel and can be adjusted up or down.
You can also buy two sets of these crab pot buoys. The hole in the center is perfect for a ¾ inch piece of PVC to fit through.
A visit to home depot for a 10-foot piece of ¾ inch PVC pipe, spray paint, PVC joints, caps, and hardware and you are ready to build!
Step One: Cutting the PVC
From your 10-foot section of PVC, cut two pieces 24 inches in length, these will serve as the main shafts of the outriggers.
Set them aside and cut 4 pieces, 12 1/4 inches in length.
Each buoy measures 11 1/4 inches, you will need an extra half inch on each end to attach the buoy section to the main T joint and the cap on the outside.
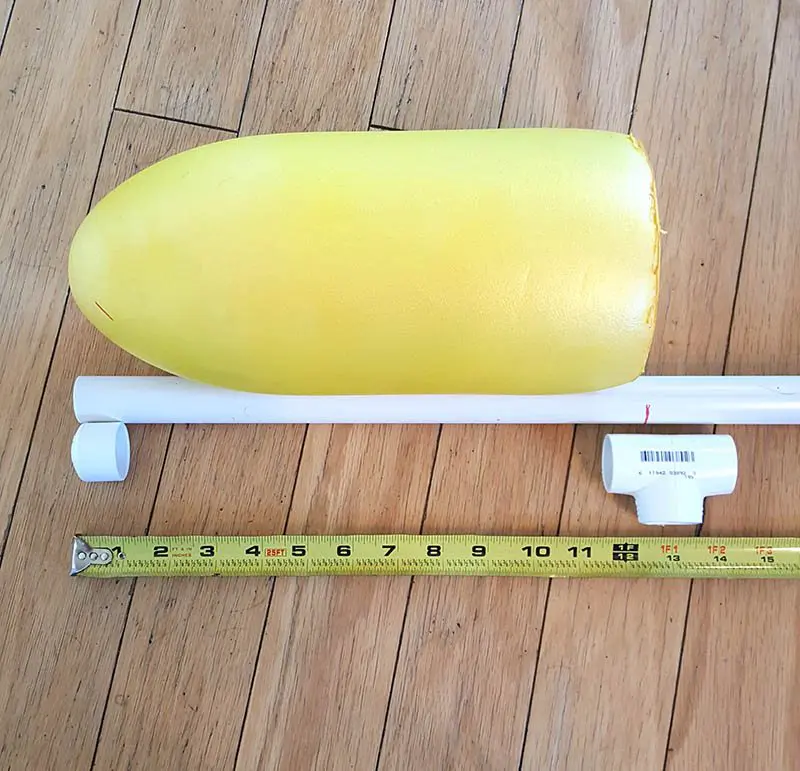
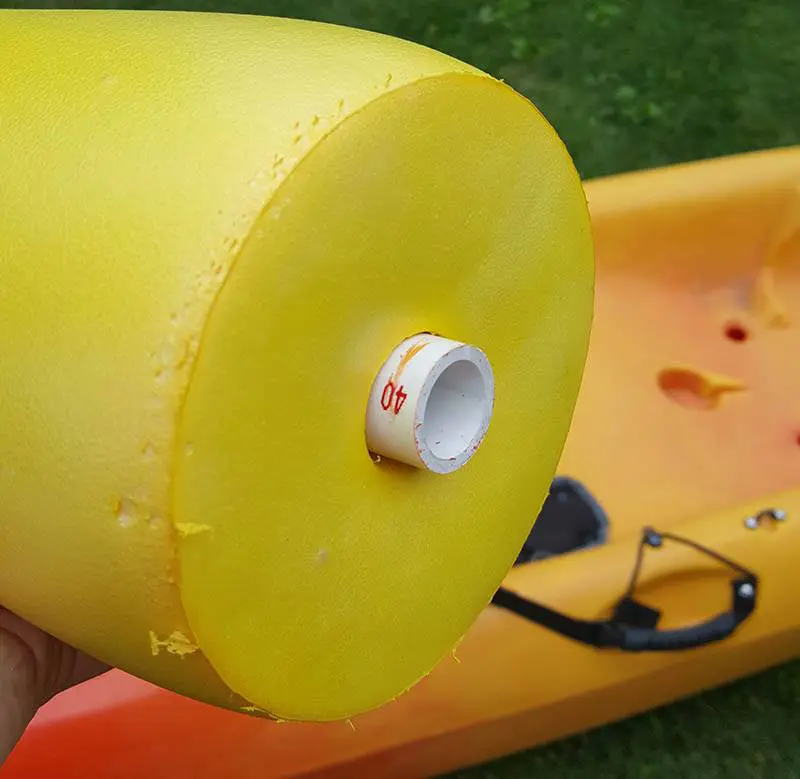
Using a rubber mallet, hammer the 12 1/4 inch sections of PVC through each of the four buoys so 1/2 inch sticks out each end for the cap and the T joint.
It’s a tight fit, so gluing them together isn’t necessary. You are now ready to paint and assemble.
Step Two: Painting and Assembling the Outriggers
My kayak is orange and yellow, to stick with that scheme, I bought a can of orange Rustoleum and thoroughly painted both shafts, T Joints, and caps.
If you are painting with a light color I would suggest wiping the PVC pieces with some Acetone to remove the lettering. I messed up and didn’t do this. Even with a heavy orange, you can still see it.

Once your paint is dry you can start gluing the outrigger together. I use clear, heavy-duty PVC glue and coat the inside of the three holes of the T joint.
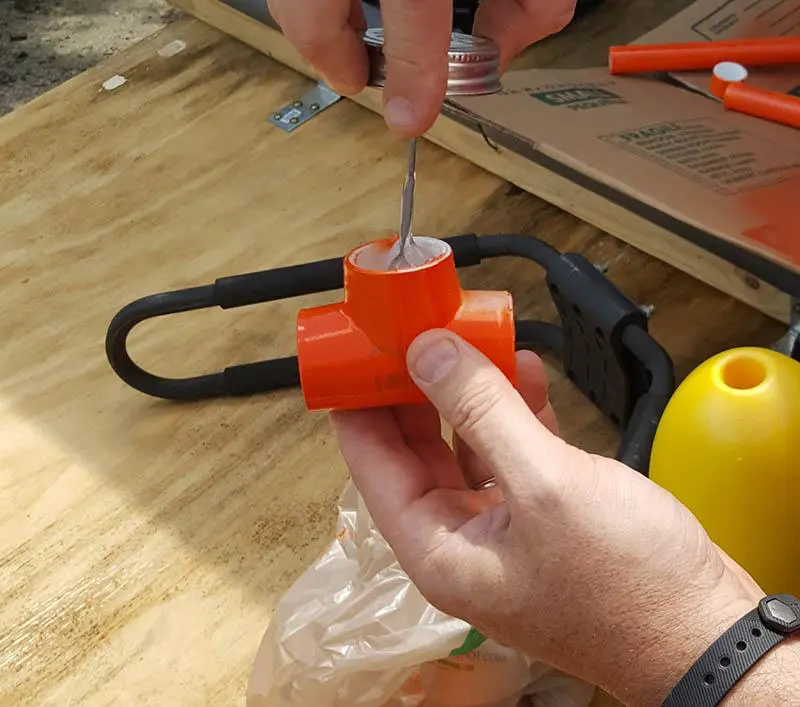
Start with the 2-foot shaft and press it into place in the top hole of the T joint.

Next, push each buoy into place in the side holes as far as they will go.
You should have about 1/2 inch of PVC sticking out of the buoy side to make a solid connection into the T joint.
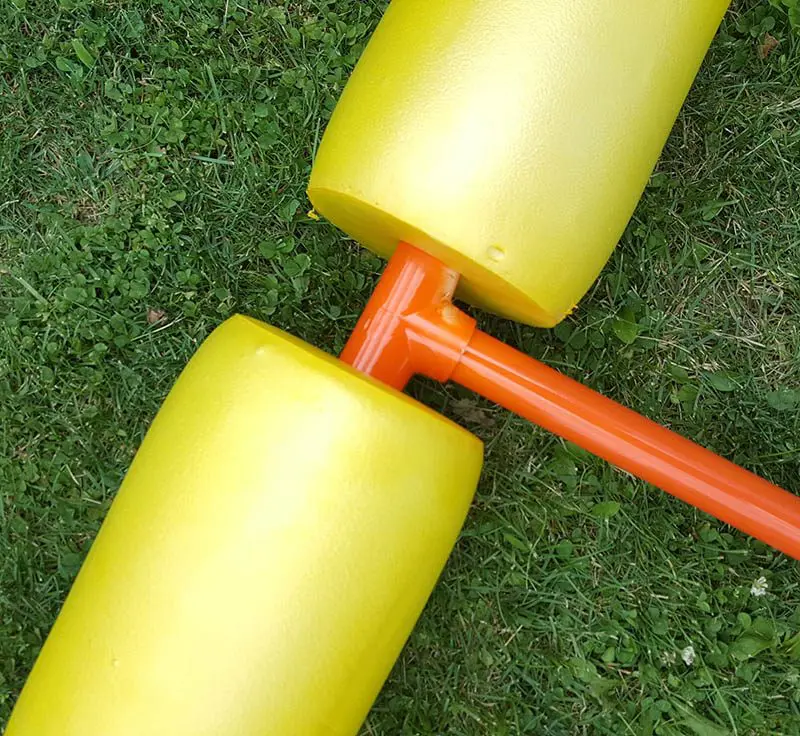
Finally, glue the caps on the ends of each pontoon. You should have about 1/4 to 1/2 inch of PVC sticking out to glue them to.
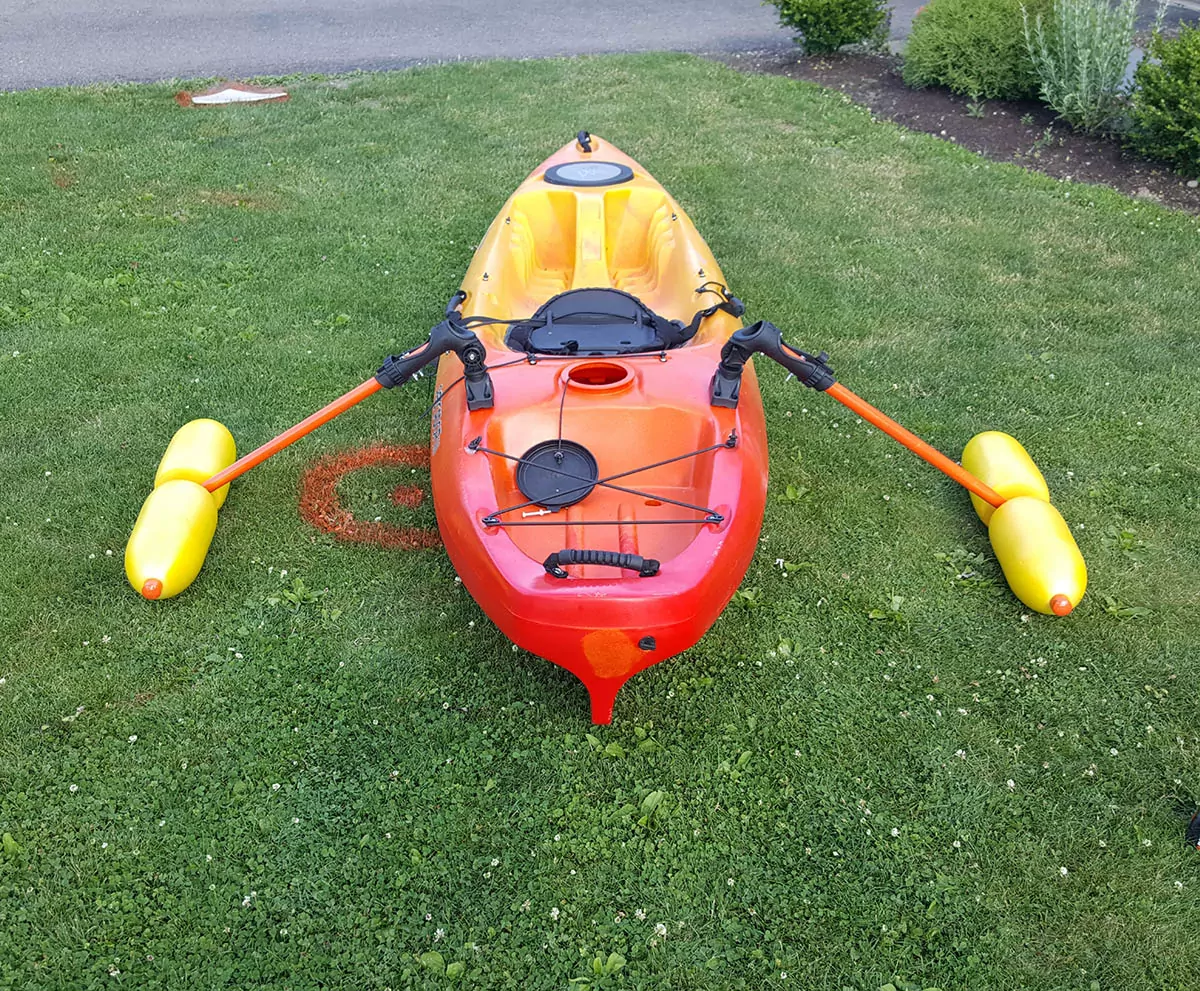
The outriggers are now ready to be attached to the rod holders.
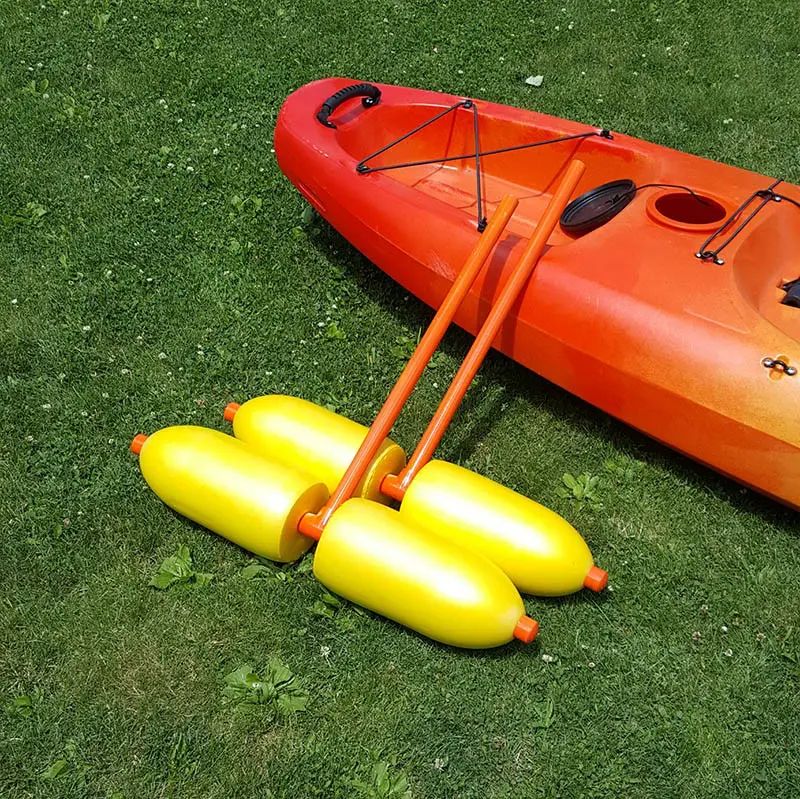
Step Three: Attaching the Kayak Outriggers to the Rod Holders
It’s important to attach the outriggers to the rod holders to properly align the pontoons so they are perfectly parallel to your kayak.
My method is strong but not pretty. Measure both shafts to be the same length and clamp the PVC to the holder.
Next, drill two, 5/16 holes through the PVC and the rod holders, thread a hex bolt through, and use a lock nut to tighten them down. The plastic on the rod holder is quite this and this connection is very strong.
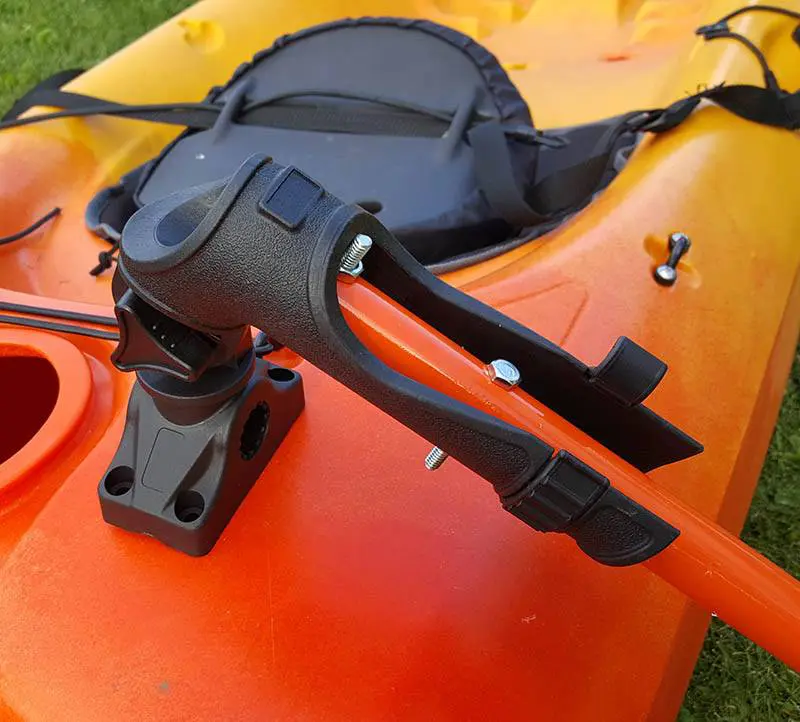
Step Four: Attaching the Rod Holders
Determine where you want your outriggers to be located. Most people choose to put them behind them so they are out of the way and don’t obstruct their fishing or paddling.
If you choose to do this, just ensure they are back far enough so you don’t hit them with your paddle.
I have a Perception Pescador 10 with two-level spots for mounting rod holder, but they are too far forward for outriggers and would interfere with paddling, so I opted to mount them further back.
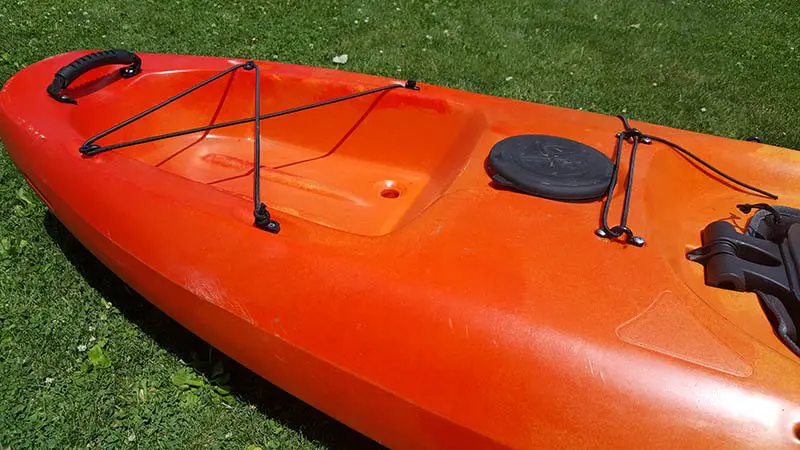
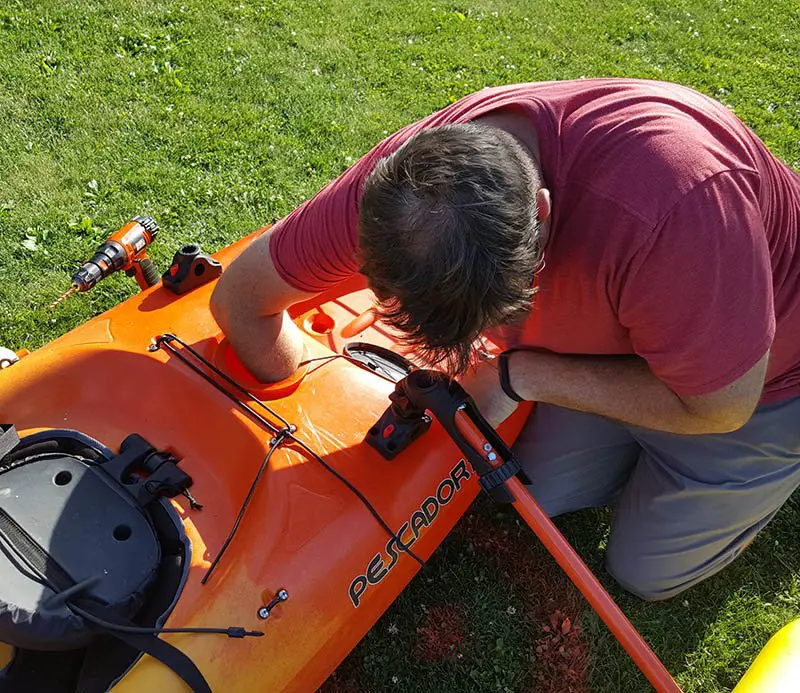
Align both outriggers to be in the same position and run parallel to the kayak. Mark the rod holder mounts, drill the four holes, and install the included hardware.
It helps to access the inside of the kayak through a bulkhead. I was able to thread the washer and lock the nuts easily.
Tighten everything down and you are done. The only thing left to do is pop the outriggers into place.
Adjusting Your New DIY Kayak Outriggers
Sometimes you won’t want your outriggers down and with the adjustable rod holders, all you have to do is loosen the knob on the side, lift the outrigger, and tighten the knob back down.
I find this useful if I have a long paddle to get to where I want to fish. I can keep them up and out of the way and then lower them when I’m ready to stand up and start fishing.
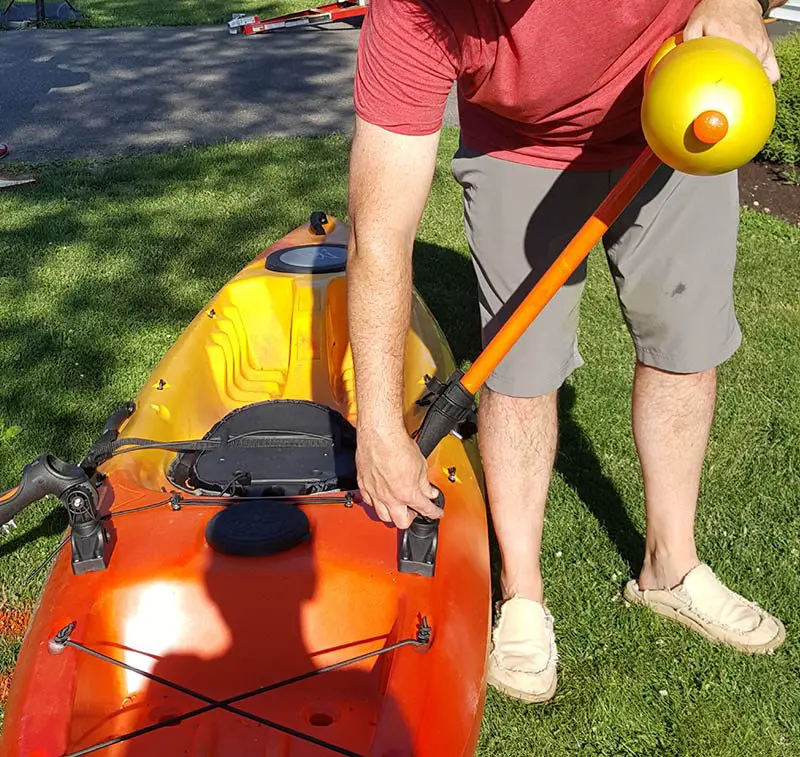
They look a little goofy in this position but they are easy to lower once you need them.
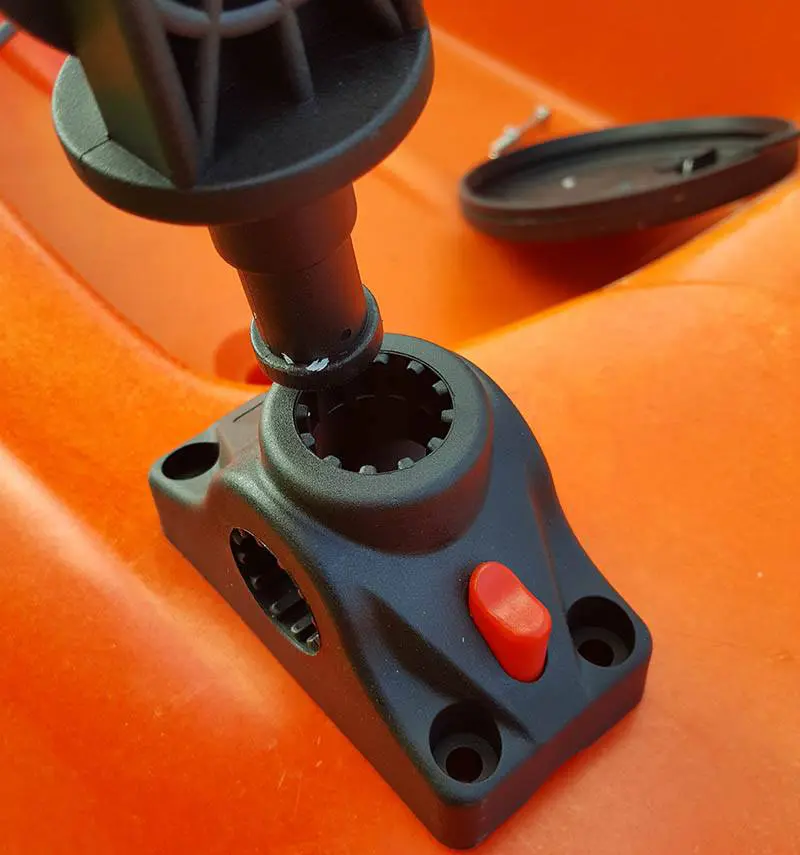
These particular rod holders have a push button release, so you can remove your outriggers with the push of a button, and rack or trailer your kayak as you normally would.
Wrapping It Up
No matter what kind of kayak you own, if you want to add stability to your craft and don’t want to spend a fortune, try building this set of DIY kayak outriggers.
They make a big difference and you will definitely get more out of your kayak. I use them when I want to stand up and fish or when I just get sick of sitting and want to paddle my kayak like a paddleboard.
For around $60 and a couple of hours of work, you will be ready to go.
If you want to get started, here are the links to the best bargains on Crab Pot Buoys and Adjustable Rod Holders.
